Quick Start Guide – SYQEL Desktop
SYQEL Desktop turns whatever you’re playing into visuals that move with the music. This guide gets you from install to a running show in a few minutes, and points you to the detailed articles for each part.
1. Download and install
Get the Mac (Apple Silicon or Intel) or Windows installer from syqel.com/download, or install from the Microsoft Store on Windows. Step-by-step instructions: Downloading and installing SYQEL Desktop.
2. Sign in
Everyone signs in, and one account works in the desktop app and on the web. Choose Continue with Google, Continue with Facebook, or type your email and click Email me a sign-in link. A password is optional. More in How do I sign up for a SYQEL account?
The first time, a few short questions and a quick tour follow. Press O any time to replay the tour.
The first time you sign in on a computer, SYQEL offers to Sync my visuals. Say yes: your visuals and playlists download, and everything then plays offline. See Account Sync.
3. Pick your audio
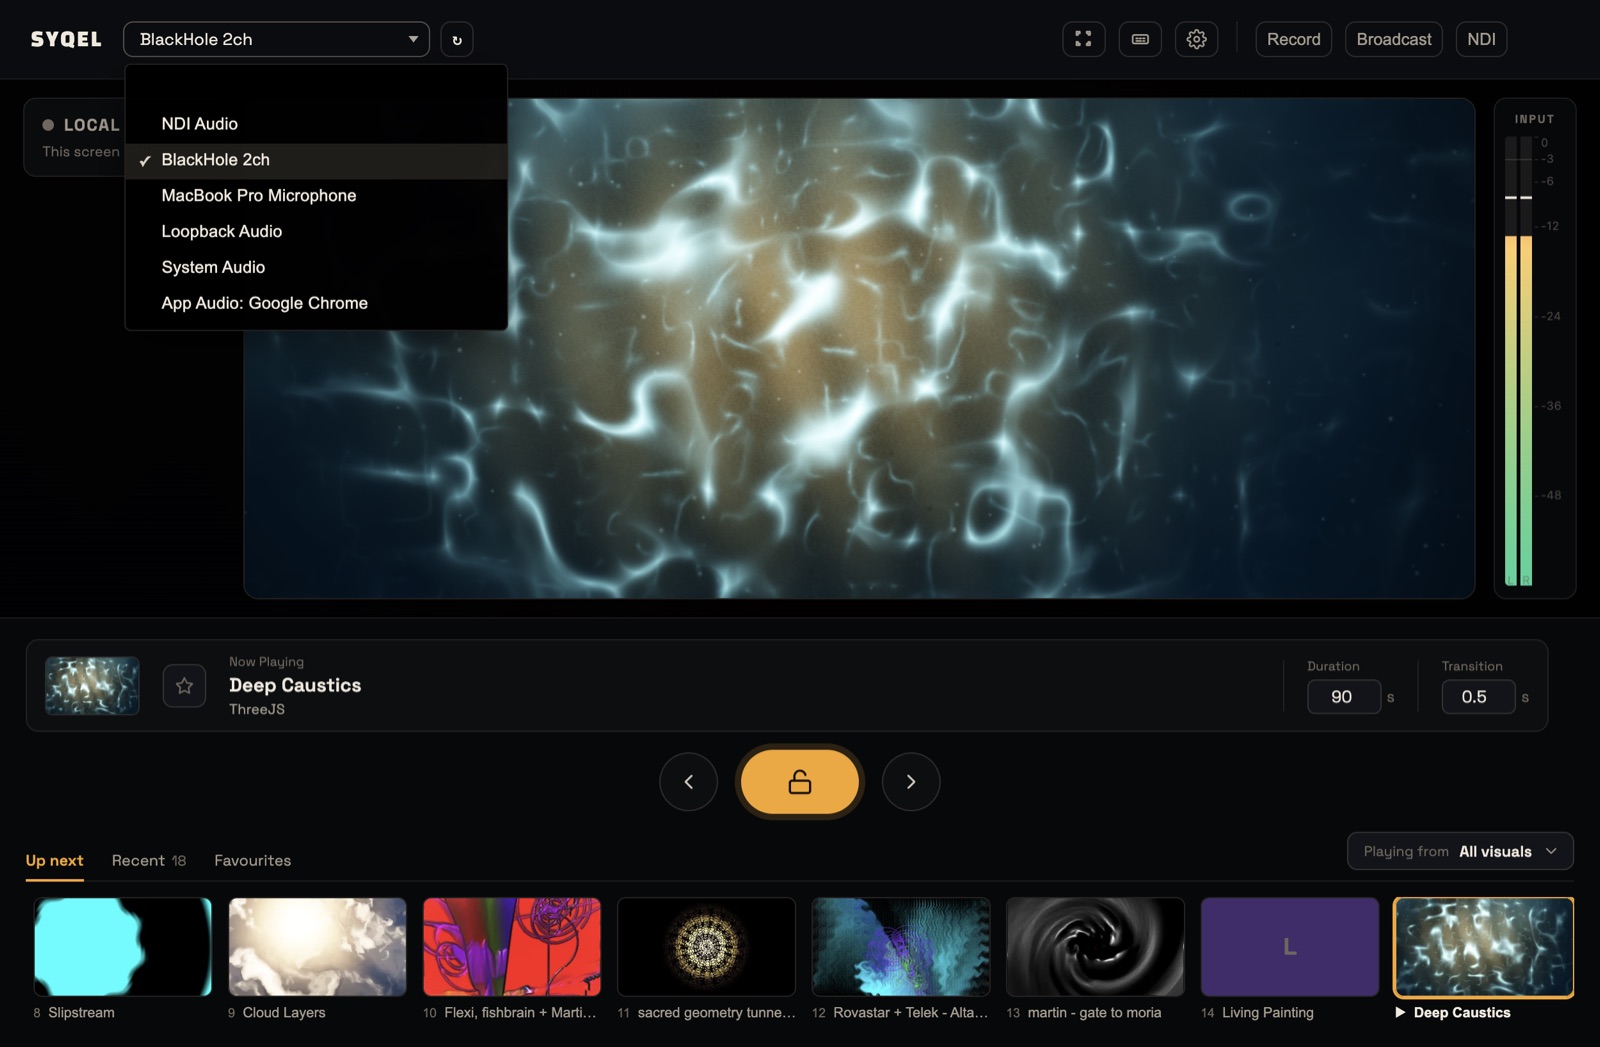
Open the audio source list at the top left, next to the SYQEL name, and choose what SYQEL listens to:
- App Audio: followed by an app’s name (for example App Audio: Spotify) hears just that app, like your music player, DJ software or browser. No cables or extra software needed.
- System Audio (Mac) hears everything your Mac plays. On Windows, pick your speakers or headphones by name to hear everything playing through them.
- A microphone or audio interface hears the room, or the line from your mixer.
App Audio and System Audio need macOS 14.4 or later, or Windows 10 build 19041 or later. On a Mac, allow the audio recording or microphone request the first time. If an app is missing from the list, start playback in it and click ↻ to refresh. More in How to connect any app’s audio to SYQEL and Troubleshooting audio detection.
4. The main screen
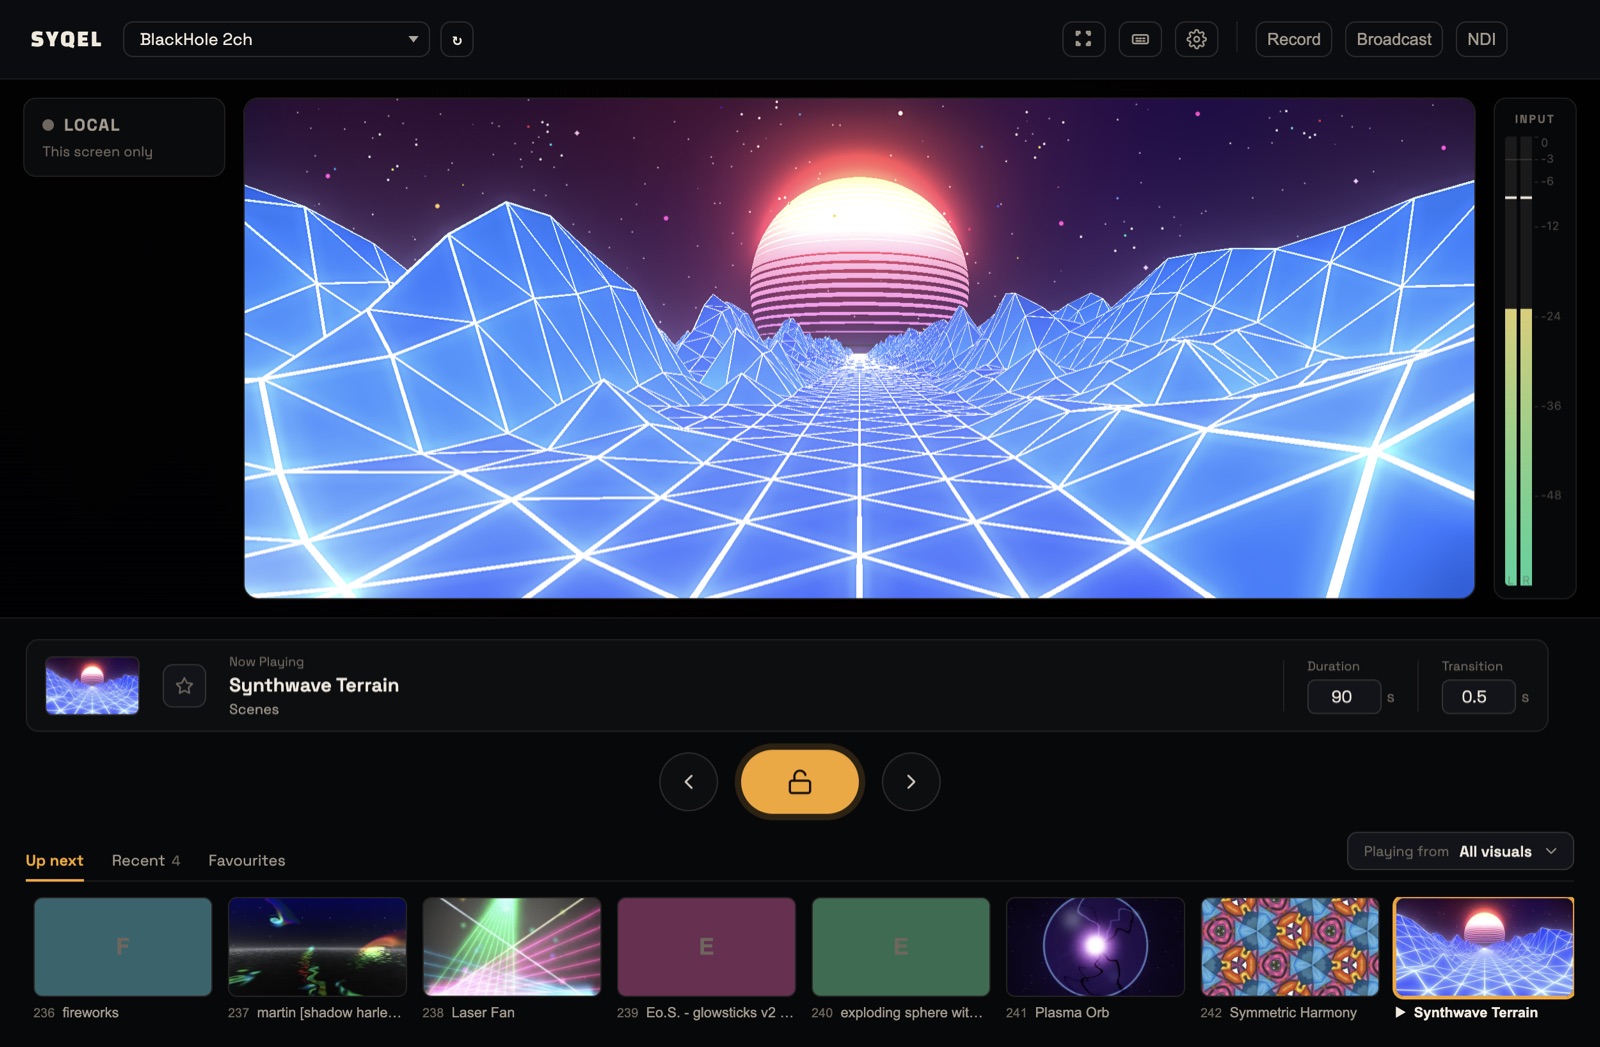
- Stage (centre): the live visual, exactly as your audience sees it.
- Input meter (right): left and right levels of what SYQEL hears. If it’s flat, the visuals have nothing to react to.
- Output panel (left): LOCAL means the visuals are only on this screen. It shows LIVE or REC when they’re going out.
- Now Playing: the visual’s name, plus a star that adds it to your Favourites.
- ‹ / padlock / ›: previous visual (Backspace), hold the current one (Enter), next visual (Space). While the padlock is on, SYQEL stays on this visual until you release it.
- Duration: how many seconds each visual plays before the next one. It shows while Settings › Playback is on Automatic (Time), the default.
- Transition: the crossfade time between Milkdrop presets. It doesn’t affect other visuals.
- Up next / Recent / Favourites: what’s coming, what you’ve played this session, and what you’ve starred. Click any tile to play it. When a playlist is playing, Up next becomes Queue.
5. Choose what plays
Click Playing from at the right of the strip. Pick All visuals, one of your Playlists, or one feed: Shaders, Image Visuals, Scenes, Milkdrop or Worlds. Your choice starts playing straight away.
To browse everything, open Settings › Library. Click a visual to play it, star it, or give it a key or a MIDI pad. See Visual feeds and Visualizer playback behavior.
6. Playlists
A playlist is your set list, and it can mix any kinds of visuals. Make one in Settings › Library with Add to playlist, or in Settings › Playlists. To play it, choose it under Playing from. See Creating a visual playlist.
7. Keys and MIDI
Press S to see every shortcut. In Settings › Hotkeys & MIDI, connect a controller and use Learn Key or Learn MIDI to map controls. You can also give single visuals and playlists their own key or pad. See Keyboard shortcuts and Connecting to MIDI.
8. Go live
The buttons at the top right send your visuals out:
- Broadcast (B) opens a clean SYQEL Visuals window to capture in OBS or similar software. On Windows it also sends a Spout feed called “SYQEL Desktop”.
- NDI sends the visuals over your network to OBS, vMix, Resolume and other video software.
- Record (R) saves four videos at once (16:9, 1:1, 9:16 and 4:5), including the audio you’re playing. They go to the SYQEL folder in your Movies (Mac) or Videos (Windows) folder.
9. Your logo
On the Free plan, the SYQEL logo is always on your output. A subscription removes it and lets you show up to nine of your own logos, switched with keys 1–9. See Adding logo watermarks and plans.
10. Settings
Open Settings with the cog in the top bar, or from the menu under your account picture. The sections are Library, Playlists, Create (make new visuals with AI), Import, Hotkeys & MIDI, Playback, Frequency Reactiveness, Logo & Watermarks, Marquee, Appearance, Account Sync and Billing. Click Back to the stage to return. Keys and MIDI pause while Settings is open.
The app updates itself. When a new version is ready, an Update available button appears in the top bar.
Did this help? If you’re still stuck, email support@syqel.com.