Connecting to MIDI
You can run SYQEL from any MIDI controller. Every control, visual and playlist can go on a pad, on every plan.
Connect your controller
- Plug the controller in. SYQEL Desktop picks it up on its own, and a MIDI pill appears in the top bar while it is connected.
- If the pill doesn’t show, open Settings › Hotkeys & MIDI and click Connect MIDI Device. The MIDI Device Connection card shows your device’s name, or No devices.
On the web app (vj.syqel.com), MIDI needs your browser’s permission: click Connect MIDI Device and allow access. Browsers without Web MIDI can’t connect.
Map a control to a pad
- In Settings › Hotkeys & MIDI, find the action under Visualizer Controls, for example Next Visual or Lock Visual.
- Click Learn MIDI. It changes to Hit a pad….
- Press the pad, key or button on your controller. The binding shows in the row and is saved straight away.
To cancel, click the button again before you press a pad. To remove a binding, click the × next to it.
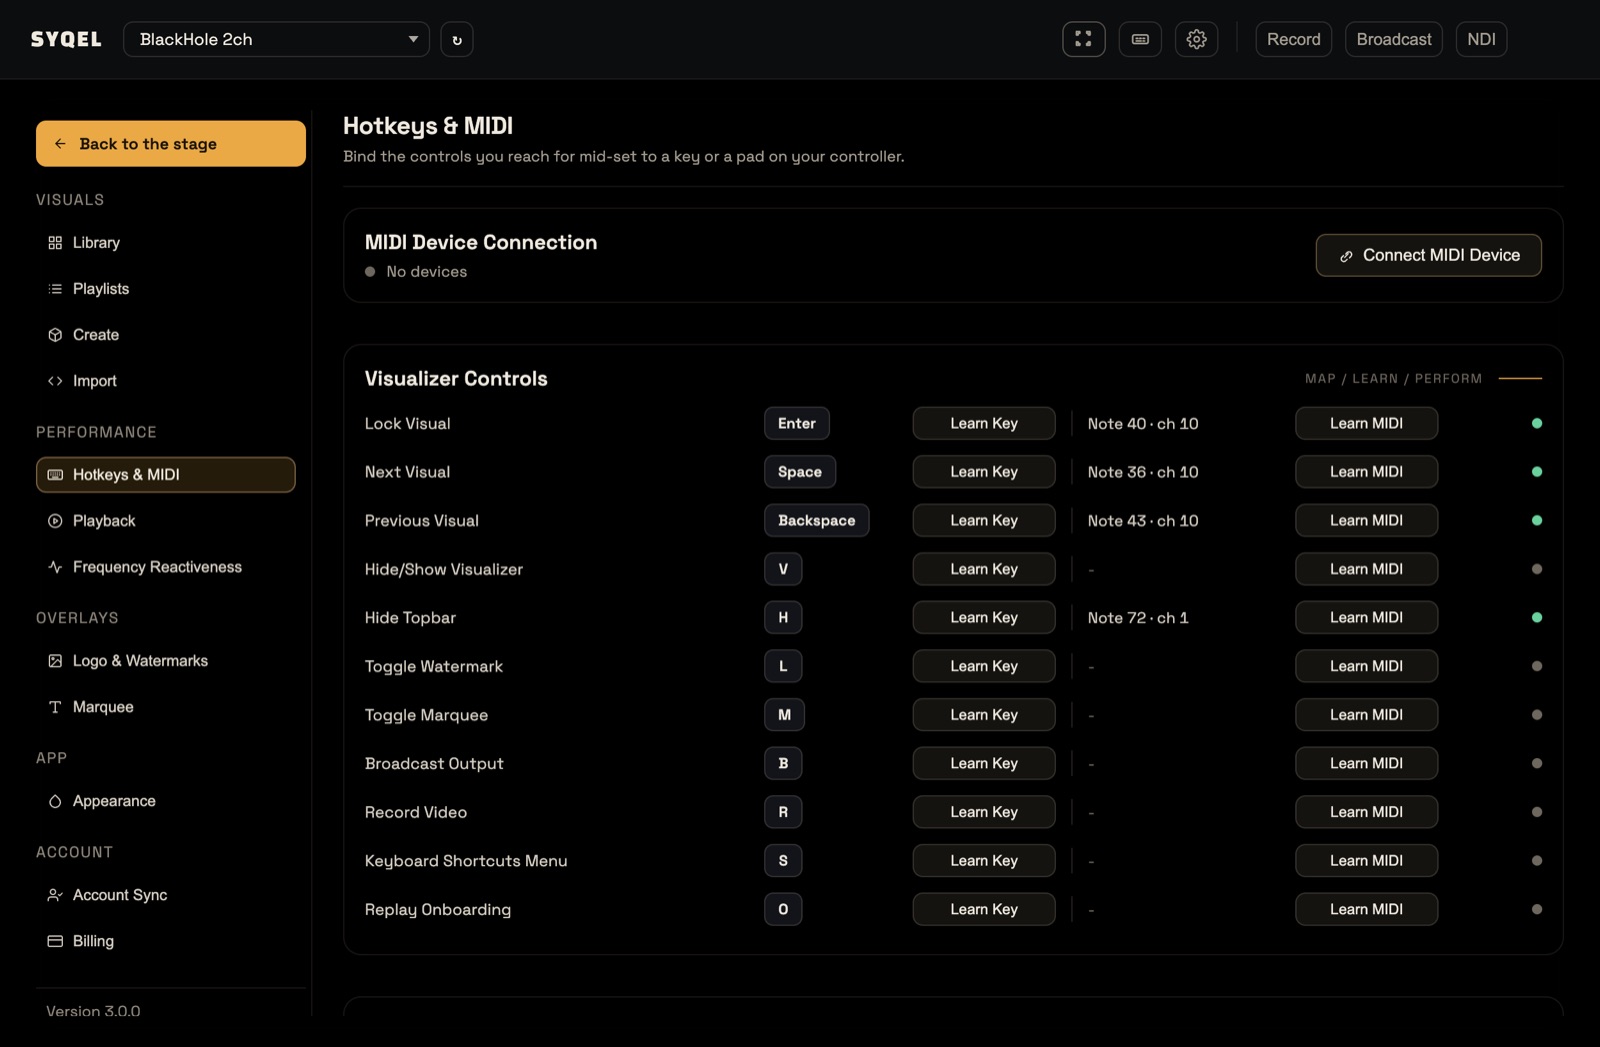
Put a visual or a playlist on a pad
- A visual: open Settings › Library, click the visual, and under Bring it up with click Set next to MIDI, then hit a pad.
- A playlist: open Settings › Playlists, open the playlist, and use the Shortcuts line to choose whether the pad plays it from the top or resumes where it left off.
Test it
Close Settings first. Hotkeys and pads do nothing while Settings is open, so you can press a pad there to bind it without triggering anything. Back on the stage, your pads are live.
Restore Defaults resets your keyboard shortcuts and clears every MIDI binding you added. See Keyboard Shortcuts for the full list of actions.
Did this help? If you’re still stuck, email support@syqel.com.